nuxt-meta-pixel
nuxt-meta-pixel

![]()
![]()
A Meta (Facebook) Pixel integration for Nuxt 3 & 4. Declare your pixels in config and the module loads them, sends PageView automatically on route changes, and exposes a fully typed $fbq everywhere — with first-class support for multiple pixels and GDPR consent.
Features
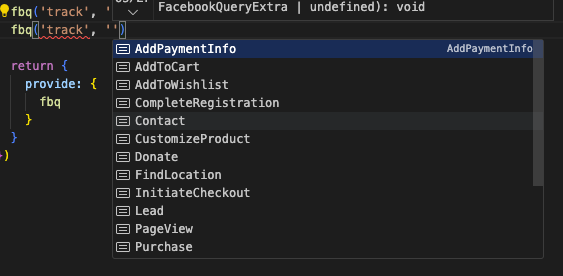
- ✨ Written in TypeScript, even the Facebook's events are typed.
- 🤖 You can load as much meta pixels as you want.
- 📨
PageViewevent are sent automatically based on configurable route match. - ⚙️ Configurable via a
.envfile. - 🚀 All the possibilities offered by Facebook are available:
track,trackSingle,trackCustom&trackSingleCustom. - 🔒 SSR-safe — the pixel only loads in the browser (client-only plugin); call
$fbqfromonMountedor client-side handlers. - ❤️ Contributions are welcome.
Quick Setup
Install the module to your Nuxt application with one command:
npx nuxi module add nuxt-meta-pixel
That's it! You can now use nuxt-meta-pixel in your Nuxt app ✨
Getting started
Module configuration
The module can also be configured under the key metapixel.
// nuxt.config.ts
// This example show how to load multiple pixels

export default defineNuxtConfig({
  modules: ['nuxt-meta-pixel'],
  runtimeConfig: {
    public: {
      metapixel: {
        pixels: {
          default: { id: '1176370652884847', pageView: '/posts/**' },
          ads01: { id: '415215247513663' },
          ads02: { id: '415215247513664', pageView: '!/posts/**' },
        }
      }
    }
  }
})
Breaking change in v3: pixels are now nested under
metapixel.pixels, andconsentmoved to a top-level (global) option. Previously pixels lived directly undermetapixel.
Module options
- enabled
boolean(default:true) - whenfalse, the module loads and sends nothing, but still provides a no-op$fbqso your components keep working (see Disable outside production). - consent
'revoke'- opt into GDPR consent gating, applied to all pixels (see GDPR consent). When omitted, pixels behave normally. see more - pixels
Record<string, Pixel>- the pixels to load, keyed by an arbitrary name.
Disable outside production
Set enabled to false to avoid loading the pixel (e.g. in development or staging) without conditionally registering the module — your components can still call $fbq safely, it just does nothing:
// nuxt.config.ts
export default defineNuxtConfig({
  modules: ['nuxt-meta-pixel'],
  runtimeConfig: {
    public: {
      metapixel: {
        enabled: process.env.NODE_ENV === 'production',
        pixels: {
          default: { id: '1176370652884847' },
        }
      }
    }
  }
})
You can also flip it at runtime with the NUXT_PUBLIC_METAPIXEL_ENABLED environment variable.
Pixel options
- id
string- your pixel id (use a string — a numeric literal can lose precision on 15-16 digit ids) - autoConfig
boolean(default:true) - enable or disable pixel auto configuration. see more - pageView
string(default:**) - glob deciding which routes auto-send aPageView. Supported syntax:**(anything, including/),*(a single path segment),?(one character), and a leading!to negate the pattern.
GDPR consent
Meta's consent is a global setting — the command takes no pixel id, so it applies to every pixel at once. It's therefore a single top-level option, not per-pixel:
consent: 'revoke'holds all pixels until you grant consent.- The config only accepts
'revoke'(opting into gating). Granting is done at runtime — tracking is allowed by default, so a config'grant'would be a no-op.
Set consent: 'revoke' so the module revokes before initialization — nothing is sent to Meta until you grant consent:
// nuxt.config.ts
export default defineNuxtConfig({
  modules: ['nuxt-meta-pixel'],
  runtimeConfig: {
    public: {
      metapixel: {
        consent: 'revoke',
        pixels: {
          default: { id: '1176370652884847' },
        }
      }
    }
  }
})
Then grant (or re-revoke) consent at runtime once your cookie banner is answered, via the injected $fbq:
<script setup lang="ts">
const { $fbq } = useNuxtApp()

function onCookieBannerAccepted() {
  $fbq('consent', 'grant')
}

function onCookieBannerRejected() {
  $fbq('consent', 'revoke')
}
</script>
Note: on a classic multi-page (non-SPA) site Meta requires calling
revokeon every page load — the module handles this by revoking on plugin init. see more
Environment variables
// .env
// This example show how to define pixel ids via your environment variables
NUXT_PUBLIC_METAPIXEL_PIXELS_DEFAULT_ID=ID1
NUXT_PUBLIC_METAPIXEL_PIXELS_ADS01_ID=ID2
NUXT_PUBLIC_METAPIXEL_PIXELS_ADS02_ID=ID3
The variable you are trying to update via an environment variable must be defined in your nuxt.config.ts. Replace DEFAULT, ADS01 or ADS02 by the names you defined.
Advanced usage
// app.vue
// This example show how to use fbq in your pages

<script setup lang="ts">
const { $fbq } = useNuxtApp()

onMounted(() => {
  $fbq('track', 'CompleteRegistration')
  $fbq('trackSingle', YOUR_PIXEL_ID, 'CompleteRegistration')
})
</script>

<template>
  <div>nuxt-meta-pixel</div>
</template>
Useful resources
Contribution
Local development
# Install dependencies
npm install

# Generate type stubs
npm run dev:prepare

# Develop with the playground
npm run dev

# Build the playground
npm run dev:build

# Run ESLint
npm run lint

# Run Vitest
npm run test
npm run test:watch

# Release new version
npm run release